
With AirTouch 5, you can install wireless temperature sensors for Intelligent Temperature Sensor (ITS) functionality. These sensors provide advanced climate control by allowing monitoring and adjustment of individual zones.
The sensors are wireless and battery powered, so there’s no need for extra cabling during installation.
Universal Compatibility: The current model of temperature sensor works with AirTouch 5.
How to Set Up a Sensor with AirTouch 5
-
Open the front panel of the sensor.
-
Use the selector dial to set the correct zone number.
-
On the AirTouch 5 console, go to the Settings menu and pair the sensor.
-
Once paired, mount the sensor to the wall in the selected zone.
After pairing, you’ll be able to:
-
Monitor zone temperatures
-
Adjust set points directly from the console or app

Button Control & Ring Light Feedback
AirTouch 5 sensors feature a ring light and button, allowing you to check zone or system status with a single tap.
When Set Up as a Zone ON/OFF Switch:
-
Dark Blue: Zone is ON
-
Red: Zone is OFF
-
Tap again to toggle the zone airflow.

When Set Up as an AC Unit ON/OFF Switch:
-
Green: AC Unit is ON
-
Red: AC Unit is OFF

When Set Up as Both (Zone + AC Unit) Switch:
-
Light Blue: AC and Zone are both ON
-
Green: AC ON, Zone OFF
-
Dark Blue: AC OFF, Zone ON
-
Red: AC and Zone are both OFF
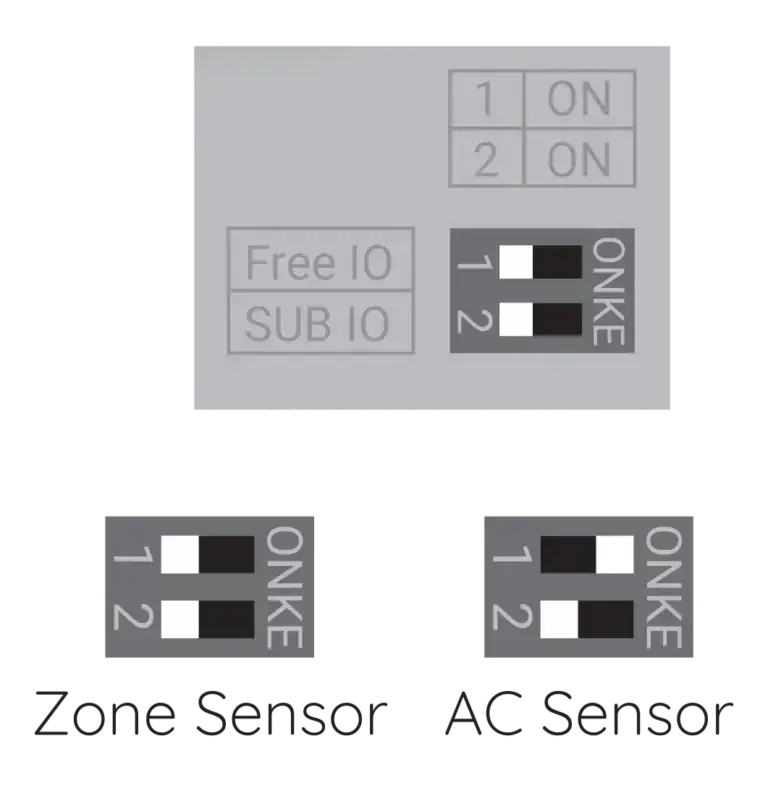
To set the switch mode, configure the dip switches on the sensor.

Using Multiple Sensors in One Zone
Yes, you can install up to 2 sensors per zone.
To set this up:
-
Set Dip Switch 1–1 on the first sensor
-
Set Dip Switch 1–2 on the second sensor
This allows you to monitor more than one area in a larger zone.
For a visual guide to the features above, check out our video below.